Showing posts with label #DesignTeam. Show all posts

Tuesday, August 31, 2021

Graphic 45 "Elegance" Box with Accordion Album and Hidden Compartment


Hello everyone!! Today I am excited to present to you my latest project as a Brand Ambassador for Graphic 45!

 Graphic 45 Elegance
Decorated Box
with Accordion Album
&
Hidden Storage Compartment

Below I have included a link to my YouTube video tutorial on the box. I also have instructions on how to create the accordion album.


Graphic 45 Supplies used:

Other Supplies:
Black Artisan cardstock (Country Craft Creations)
Scoretapes
Tape runner
Adhesive liquid
Glue Gun (for adhering flowers)
Black elastic 1/16 cord
metal grommet
grommet tool
scissors
scoreboard
bone folder
I have also used some pink flowers, lace,chipboard heart, and pearls from my stash.


A video walkthrough of the completed set is available on my YouTube channel as well.


Measurements and Album instructions

Album measures 4 3/4"X 4 3/4" closed.

1. Cut a sheet of black cardstock to 4 3/4" X 12"
2. Score at 4 3/4, 5 1/4, 10, and 10 1/2. This will create the base.
3. To create pages if starting from scratch first cut 6 4 1/2" X 4 1/2" from the black cardstock. Round all the corners of each one and set aside.
4.Cut 5 strips of black cardstock to 1" X 4 1/2". Score all of these at 1/2" down the middle, fold and burnish. This will create 5 hinges. Round the ends of these before adhering to the pages.
5. Adhere each hinge between two of the pages and alternate folding direction. This will create an accordion style folded page system.
6. Pages can be decorated before or after adhering the album inside the base.
7. To adhere album inside base add glue or scoretape to back of last page and adhere inside base.Below is a photo showing the decorated base I made.


 If you are creating the stretchy band closure as I did a grommet will need to be added to the flap as shown below.

Decorate and embellish your pages using fussy cuts, papers, stickers, chiboards, and ephemera!
This album could be made by itself as well and in any paper collection.
Thanks for taking the time to view my post and I hope I have inspired you to create something beautiful!
Happy Papercrafting!




Thursday, July 19, 2018

Butterflies and Blooms Canvas for Creative Paperclay®

Hello everyone! Today I am up on the Creative Paperclay® blog with this beautiful collage using Delight™ air dry modeling compound, silicone molds, Dew Drops, and acrylics from Plaid® and Art Anthology!
For all the details on how I created my collage head over to the Creative Paperclay® blog!

Have an amazing crafty day!!
Jenn

Monday, July 9, 2018

Rita Barakat Designs and Tonic Studios

Hi There! If you have arrived here from Rita Barakat's blog your on your way to a super fun hop!!
For my project I would like to share with you this fun art journal page!!


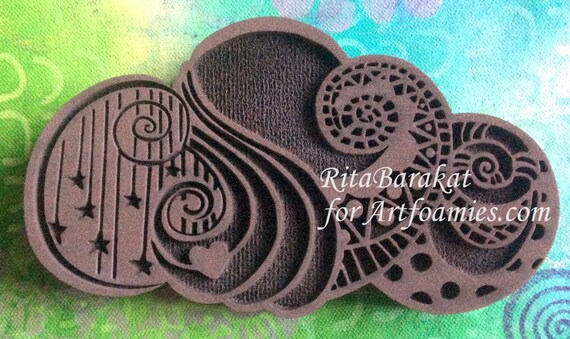
 I love just sitting down with my art journal and some products and letting my imagination take over. It is so relaxing! This page started with a background created using Rita's Zen Doodle Cloud Stamp from Art Foamies. 
After stamping I used watercolor pencils by Tonic to finish the background.
I added the sweet face using Rita's "So You Say You Can't Draw" Stencil and then watercolored her as well.


This week Rita Barakat Designers are doing a spotlight on Tonic Studious USA! 
We are kicking off with a blog hop and Mixed Media Monday tonight at 8pm CST!
Make sure to check out everyone’s posts and comment, as each comment is a chance to win!

Next up on the hop:


Tonic Studios Nuvo Crystal Drops add that extra sparkle and shine!


Thanks for hopping with us!! Remember to comment on each post on the hop for your chance to win our giveaway!!
After you have commented on each blog make sure to join us next Monday, July 16th on Mixed Media Monday when we announce the winner!


Wednesday, June 27, 2018

Artist Trading Coins for The Robin's Nest


Hello Everyone! Thanks for stopping by my blog today! It's my turn over on The Robin's Nest Blog and I have created some super fun Artist Trading Coins using The Robin's Nest Dew Drops! These are great embellishments for your cards, layouts, ATC's, and so much more! They come in so many amazing colors as well. For more on how I created these check out the The Robin's Nest Blog!
Dew Drops are available online at:


Have an amazing day!
As always stay crafty!!
Jenn

Tuesday, April 10, 2018

Timeless for Blank Page Muse

Timeless


It is time for another fun challenge over at the Blank Page Muse Stamps blog! This month the theme is black and white plus one. This was an easy choice for me because purple is my favorite color.
For all the details on the challenge and to see the rest of the teams amazing creations click on the picture link below!!
For my "Timeless" project I used the following Blank Page Muse stamps
Also available at Blank Page Muse are the amazing Baked Textures from Seth Apter! I used the Rocky Road.

Other Supplies:
Small plaque
paper clay molded flowers
paper flowers
Art Alchemy Opal Magic paint in violet-green
Black gesso
White Acrylic Paint
Black Archival Inkpad
wooden oval label
paperclay molded clock
white cardstock
chipboard
cardboard scraps
hot glue
stencil
Texture paste 
Tape runner
Hot glue and a glue gun
purple spray ink
White inkpad
clear embossing ink
clear embossing powder

Here is how I created mine:
Start with the plaque prep. Add some texture by stenciling with texture paste and let that dry.Coat with black gesso and allow to dry completely. Use white ink to do some random stamping (Correspondence script stamp). Add some splatters of watered down white acrylic paint. Add some baked texture in random areas including the edges using embossing ink. Heat set with a heat tool and set aside.

Next prep the dragonflies and other stamps. Use black archival ink to stamp two dragonflies. Coat both with clear embossing powder and heat set. Spray one with a purple ink spray. Set them aside to dry. Stamp the others from the Fairies and Blossoms stamps and clear emboss these as well.

Adhere the purple dragonfly stamped image to a piece of medium chipboard and fussy cut. Fussy cut all of the other stamped images as well.
Start adhering molded paperclay flowers and clock to the plaque. Coat them with black gesso and once they are dry add the purple using Art Alchemy Opal Magic paint.

Paint the small wooden label white and ink the edges in black archival ink using a sponge applicator. Add a sentiment sticker and adhere to the top of the plaque.

To add dimension, add cardboard scraps stacked on the back of the dragonfly as shown below before placing on the plaque. Layer the black and white stamped dragonfly on top of the purple one by adding a strip of adhesive or glue to just the middle and then slightly bend the wings to show the purple below.


Finish it off by adding white paper flowers and some more splatters of watered down white acrylic paint.
Here are a few close-ups showing all of the great detail and texture.


Thanks so much for viewing my blog today! I hope that you enjoyed my project and that you will join in the fun challenge at The Blank Page Muse Stamps!!

For many more beautiful stamps head to the Blank Page Muse Online Store!

Until next time! Happy Creating!
Jenn