Showing posts with label #Papercraft. Show all posts

Saturday, July 30, 2022

Graphic 45 Brand Ambassador Project - Safari Adventure Interactive 6X6 Folio


Hi everyone! Thanks so much for visiting my page! Today I am sharing a fun tri-fold interactive folio I have created using the gorgeous Graphic 45 Safari Adventure Deluxe Collector's Edition. Below are basic instructions to construct the base, flaps, and pockets. This can be made in any size and with any of your favorite papers!

**Please Note** As stated in my walkthrough video, I have used some older items from this collection that I had in my stash.
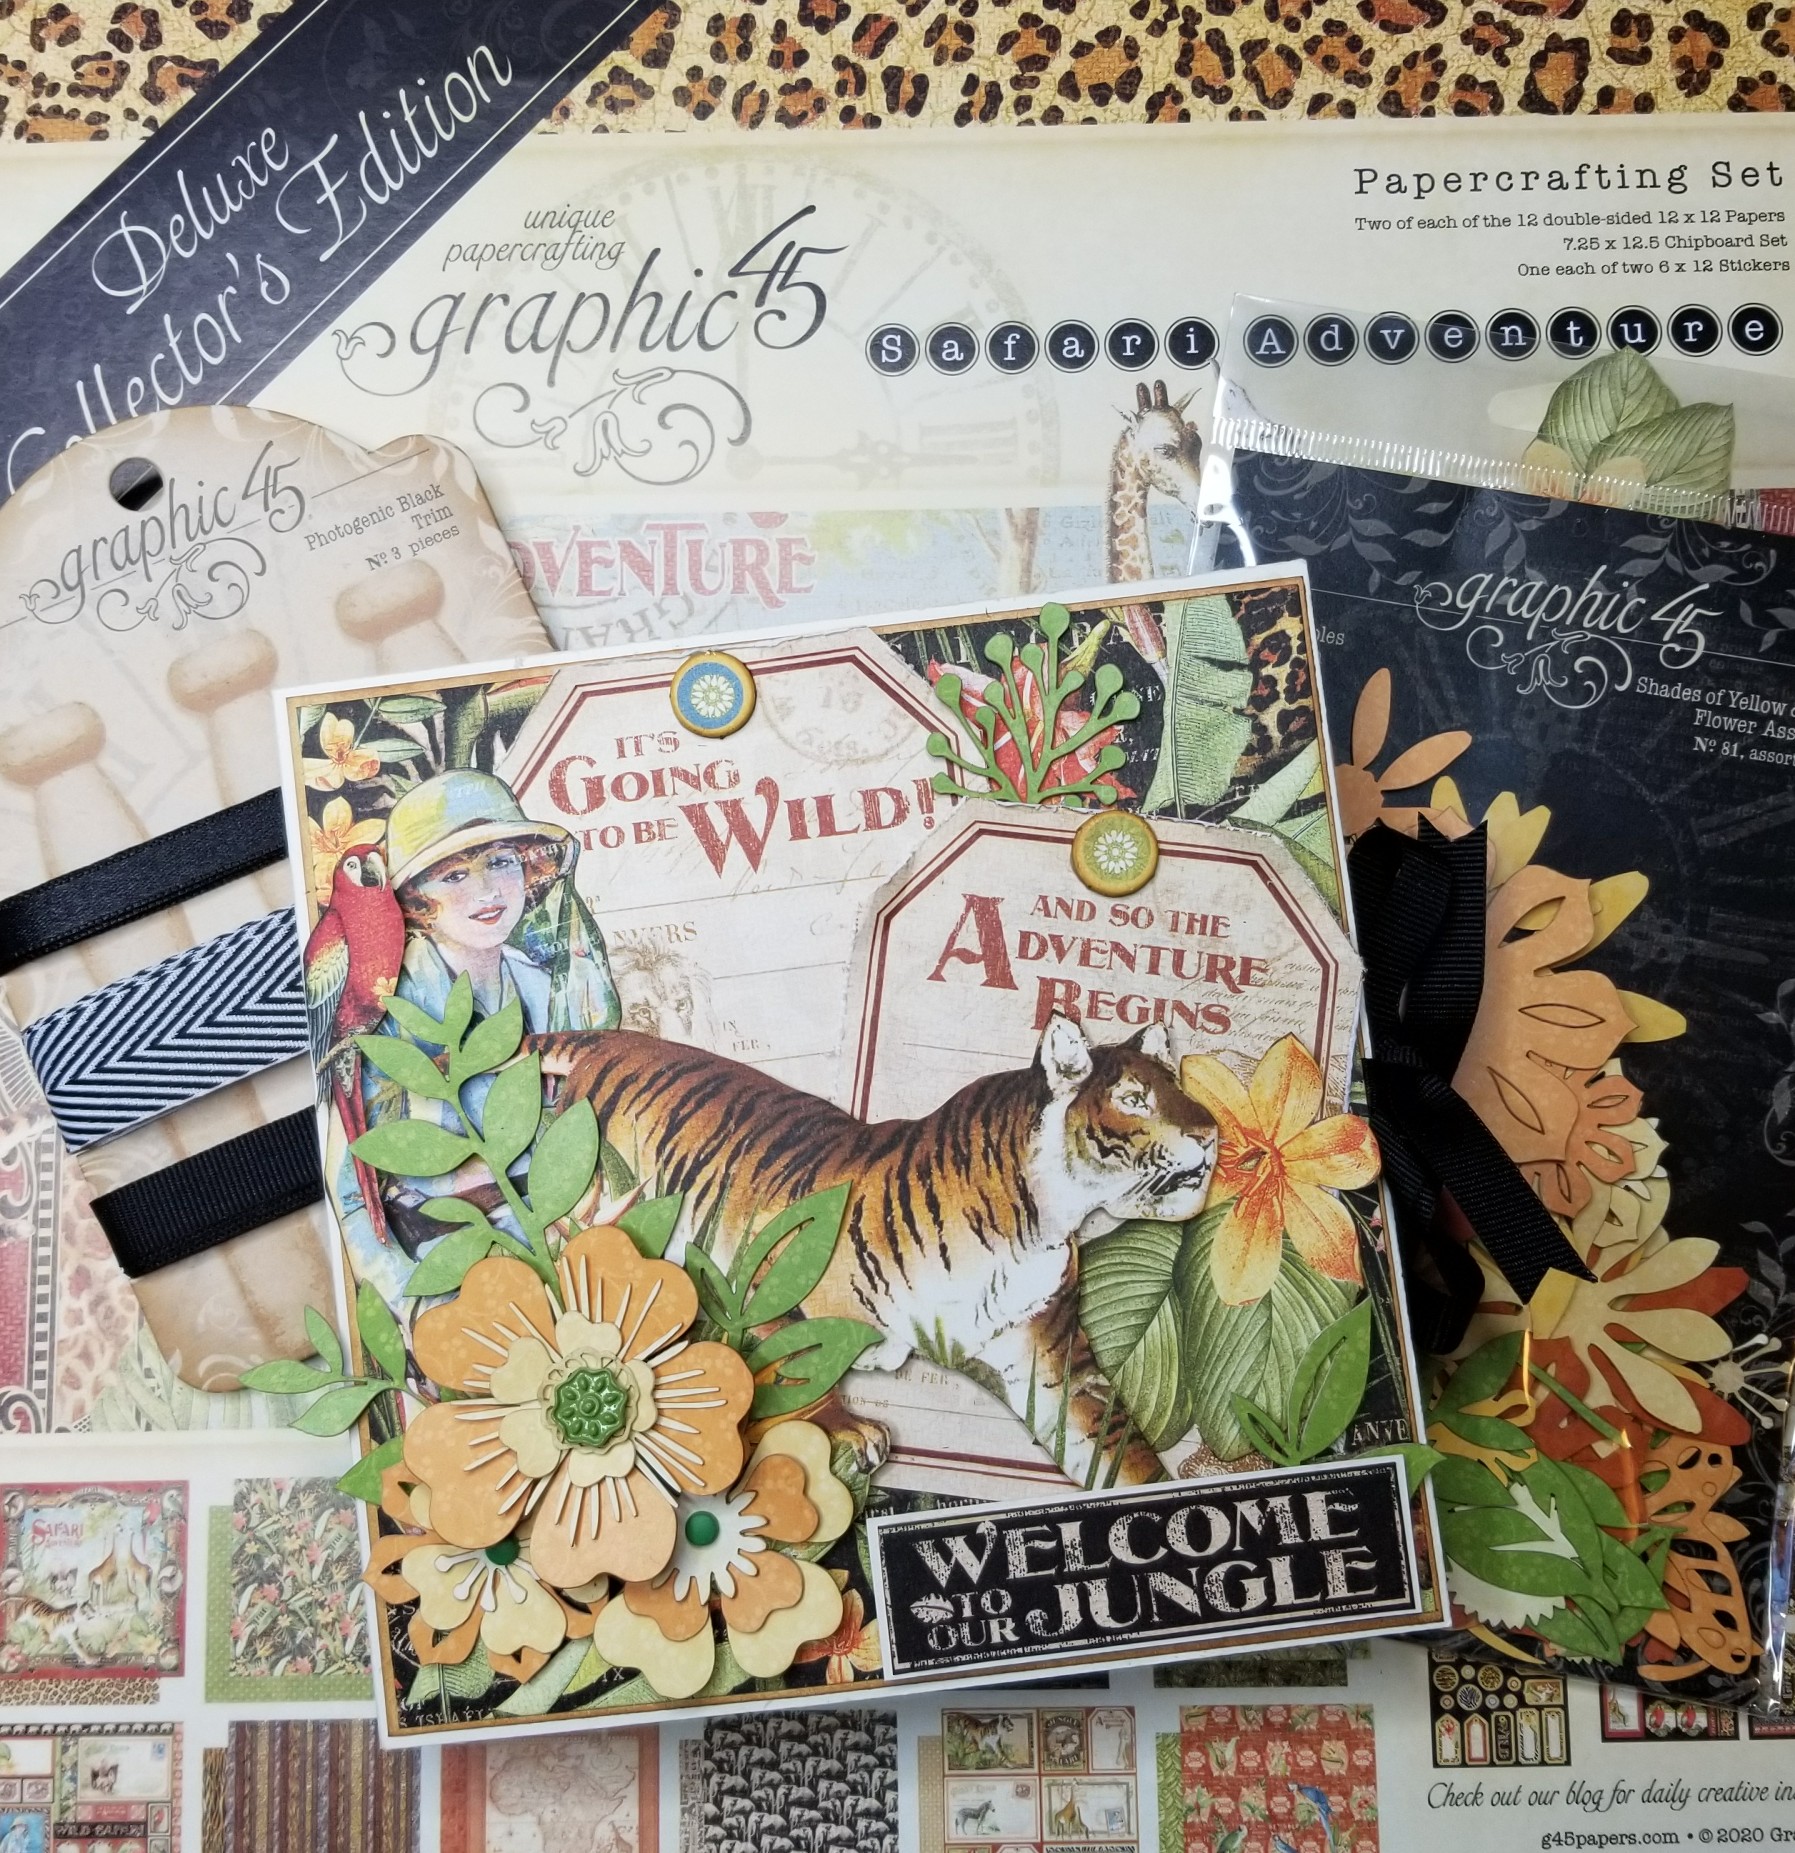


Additional Supplies and Older Collection Stash Used:
Heavy Ivory Cardstock
Brads
Adhesives
Safari Adventure Journaling Cards
Safari Adventure Patterns & Solids
Safari Adventure Tags & Pockets

To create the base of this folio:
Heavy (110lb) cardstock in a solid color such as the ivory I have used. Cut 2 pieces at 6"X12" and join together to create one long 6"X231/2" piece when using 1/2" scoretape to join.
Place long ways on a scoreboard and score at 6 and 61/2". Fold at the 6 1/2" and place back at zero. Score again at 6 and 6 1/2". Repeat folding on 6 1/2 and retuen to zero. Score at 6. The remaining length will become a pocket.

Flaps & Pockets
Section 1 - Front Inside Cover- 1 flap @ 6"X5 1/2" score at 1/2" on the 6" side.
Gusseted Pocket - 5 3/4"X2 3/4". Score at 1/4" on 3 sides for 1/4" gussets.

Middle Interactive Section - 2 flaps at 5 3/4"X6 1/4" Scored at 1/2" on 6 1/4" side.
Cut apart flap - Cut from paper collection
1 flap (under cut apart flap) -5 1/4"X5 3/4". Score at 1/2" on 5 3/4" side.
Flap Pocket - 5 3/4"X 2 3/4". Score at 1/4" on three sides for 1/4" gussets

Section 3 - Back inside Cover - 1 flap 5 1/4"X6". Score at 1/2" on 6" side. This is placed over the pocket created with the leftover length of the base.

Have fun! Decorate however you like and use this collection or one of your other favorites!
This is a fun folio that would make a great gift!

Thanks For Watching!
Happy Papercrafting!


Wednesday, April 13, 2022

Graphic 45 Alice's Tea Party Upcycled Chest and Minis


Hello everyone!! Today I am sharing my second April project as a Brand Ambassador for Graphic 45.
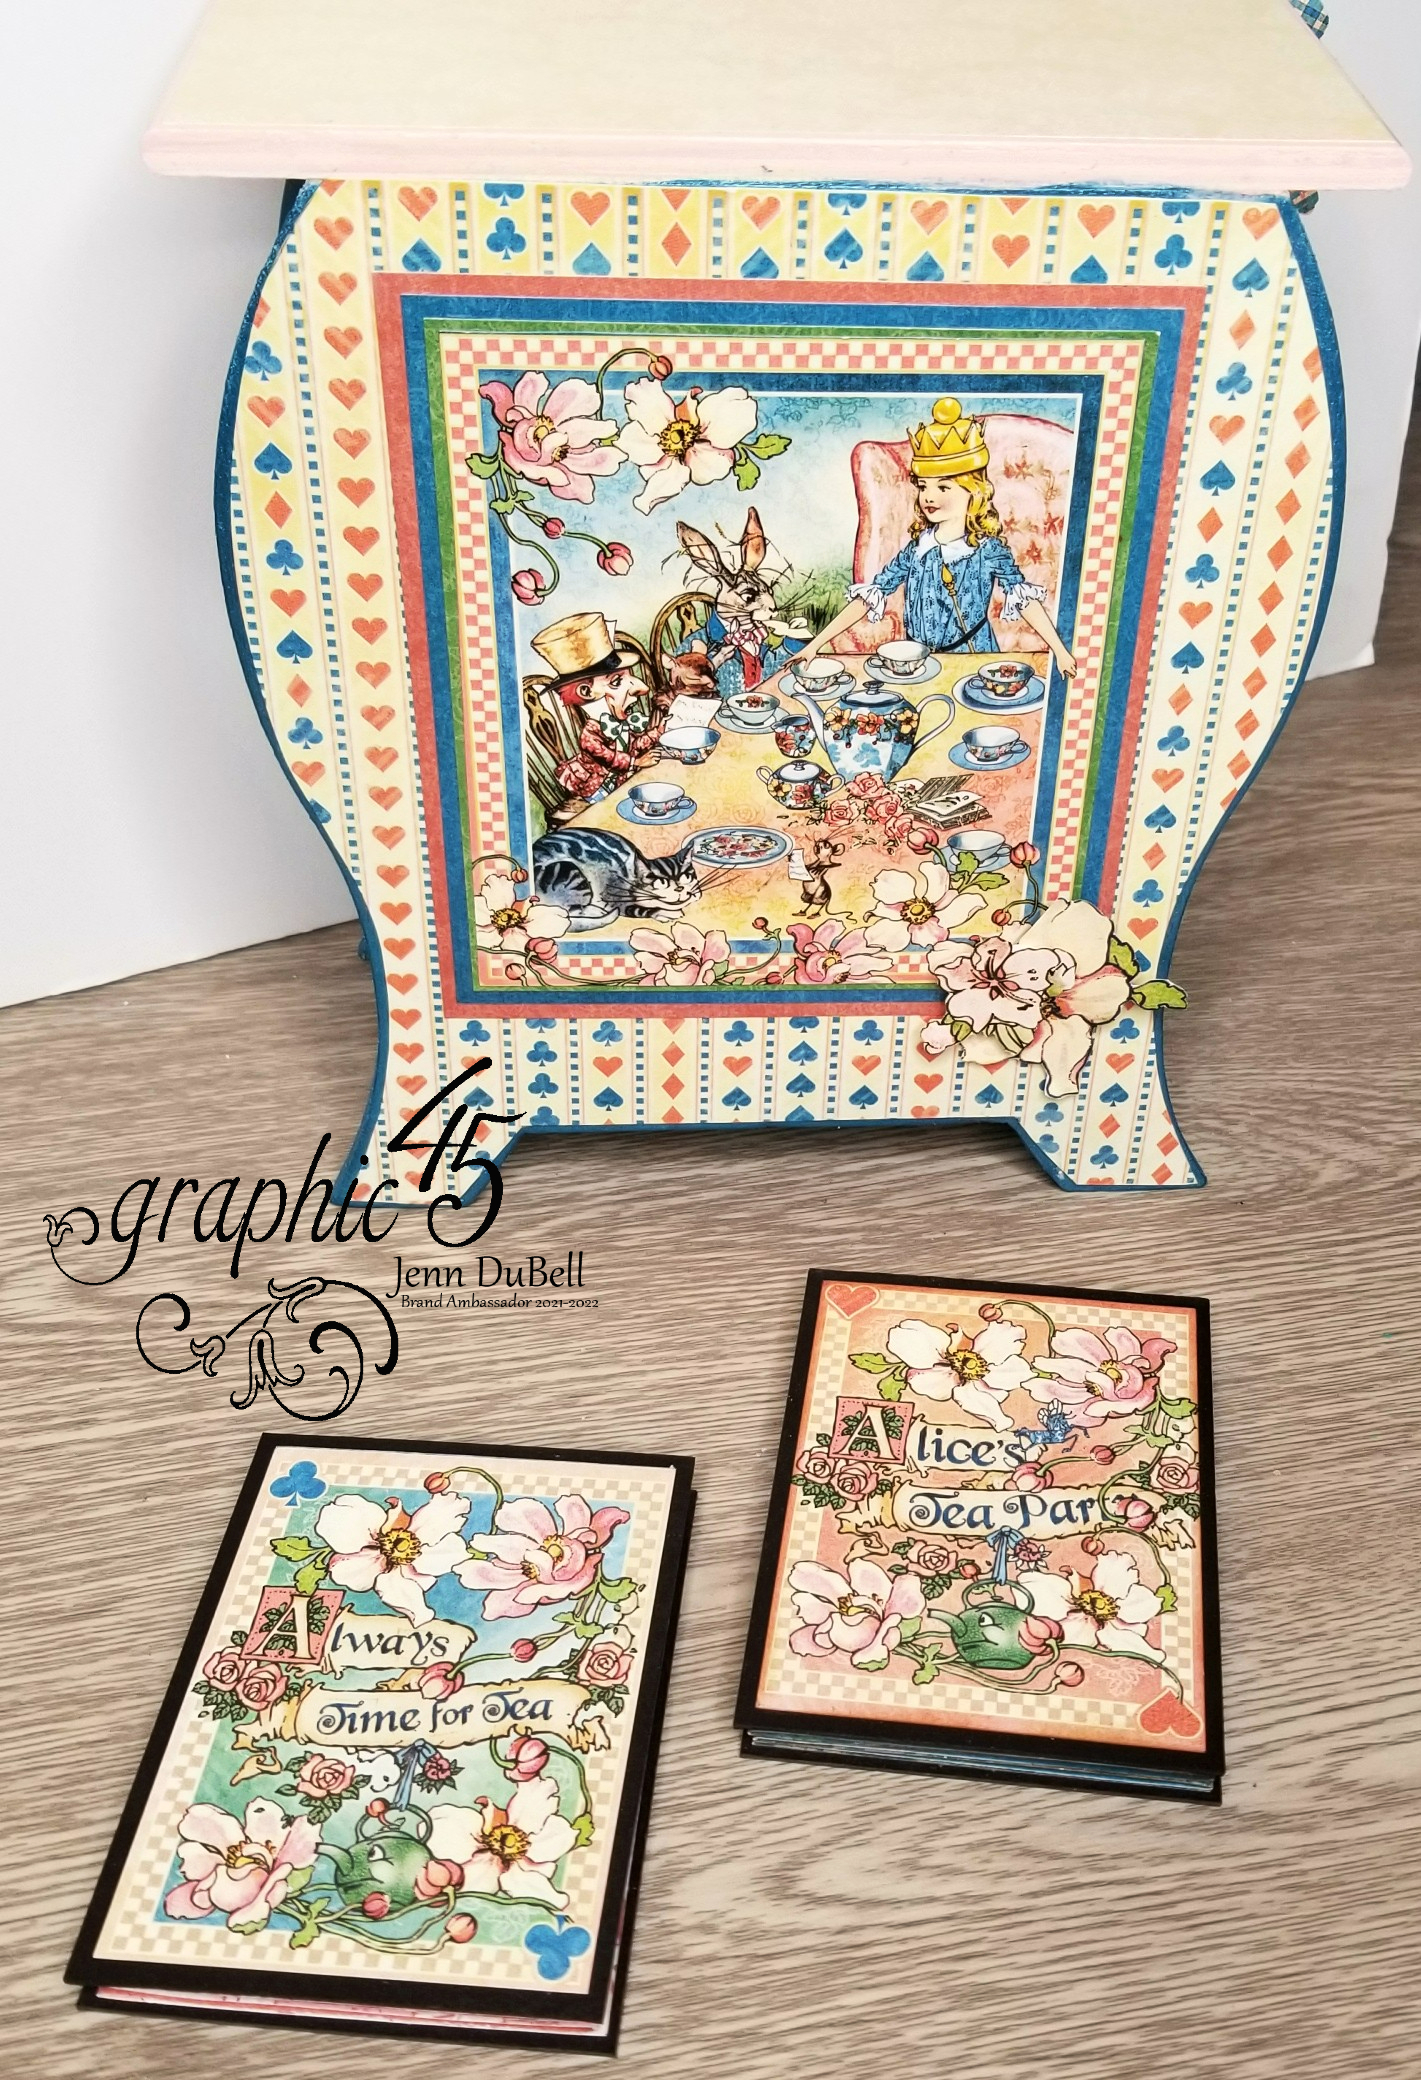
This month's G45 challenge is .....#G45upcycle and I wanted to play along. Using the beautiful Alice's Tea Party paper collection, I have upcycled a wooden chest. I decoupaged the papers on the chest and added some fussy cuts and pretty crystal knobs. I also created some fun mini accordion albums that fit inside the little drawers! 

Click the photo link below to see all the details of this fun challenge!


Here are some closer views at my fun upcycled chest....


The fun little mini accordion albums measure 3"X4". They were made using the 3X4 cut aparts and the P&S. The covers were made using G45 black chipboard.


Graphic 45 Supplies:
Alice's Tea Party 12X12 Collection Pack
Alice's Tea Party 8X8 Paper Pad
Alice's Tea Party 12X12 Patterns&Solids
Black 12X12 Chipboard Sheets (10pk)

Additional Supplies:
Small wooden chest
Liquid Adhesive
Paper Cutter
Score Board and tool
Scissors
Foam Adhesive Squares
Decoupaging liquid (I use Mod Podge)

Thanks For Visiting and viewing my project today!
Join in the fun and upcycle something using your G45 papers for a chance at a great prize pack!!

Happy papercrafting!


Wednesday, April 6, 2022

2022-2023 Graphic 45 Brand Ambassador Audition - "Let it Bee" Mini


 Hello friends!! Today I am excited to share my audition project for the 2022-2023 Graphic 45 Brand Ambassador call.
It has been an amazing year with this team and I hope to continue. For my project I have used the new "Let it Bee" Collection and created a fun tri-fold 6X6 mini album.


Check out my video on my YouTube channel for all of the details including a complete walkthrough, tutorial and cut guides!


Wish me luck!

Thursday, July 22, 2021

Graphic 45 Portrait of A Lady Easel Pair


Hello! Thank you for stopping by my blog today!
I am excited to share a beautiful pair of easel cards I created using the amazing Portrait of A Lady collection from Graphic 45.

Supplies:


2 each of 12 double-sided 12 x 12-Inch papers (24 total)

27 die-cut chipboard embellishments

2 – 6 x 12-inch cover weight stickers sheets

Graphic 45 Square Tag & Clock Dies

Graphic 45 Rose Bouquet Collection - Ivory & Natural

Graphic 45 Rose Bouquet Collection - Precious Pink

Graphic 45 Square Tags Kraft

Graphic 45 Metal paper Charm Clips

Ivory cardstock

Kraft cardstock

Peach cardstock

Medium weight chipboard

Glue

Scortape

From My Stash:

G45 Portrait of A Lady 8X8 Paper Pad

Green Ribbon

Ivory Flower Sprays

 Chipboards

To begin, I cut the bases of my easels using ivory cardstock in a medium weight.

5 1/2" x 11 1/2" - Cut two

Place on scoring board and score at 2 3/4", 5 1/2", and 11. The last 1/2" is used to adhere the pocket.

For the pocket cut ivory cardstock 3" X 6 1/2" and score on both sides at 1/2". The 1/2" on each side will be the gussets which will adhere to the sides of the base. Repeat this for second card or as many cards as you are creating.

For the covers I cut two 51/2" X 5 1/2" from ivory cardstock.

*Note* - These will adhere to the bottom front 2 3/4" portion of the folded base.

 Cuts for mattes and decorative papers

*Note* This cut guide is done per the way I decorated my cards using 2 mattes on my card fronts and pockets. This guide can be adjusted to your preferences.
Covers - 
Matte 1 - 5 3/8" X 5 3/8"
Matte 2 - 5 1/4" X 5 1/4"
Decorative paper -This is done in 2 pieces
2 3/8" X 5 1/8"
2 7/8" X 5 1/8"

Inside (above pocket)-
*Note* Adhere this piece before adhering pocket
2 3/4" X 5 3/8"

Pocket Covers-
Matte 1 - 2 7/8" X 5 3/8'
Matte 2 - 2 3/4" X 5 1/4"
Decorative paper - 2 5/8" X 5 1/8"

For the inserted tags I have used the Square Tags & Clocks die to cut the decorative pieces and adhered them to Graphic 45 Square Tags in kraft. I have also used the metal paper charm clips leaf charms to add a hanging embellishment to my tags.

All of my papers have been edged with Distress Ink in Vintage Photo.

Such a beautiful collection to create with!! I have used flowers, chipboards, stickers, and fussy cuts to embellish mine.


Thanks again for visiting my blog and viewing this project today!

Be sure to follow the blog at Graphic 45 for lots of inspiration!